

FALL LEAVES ART LESSON
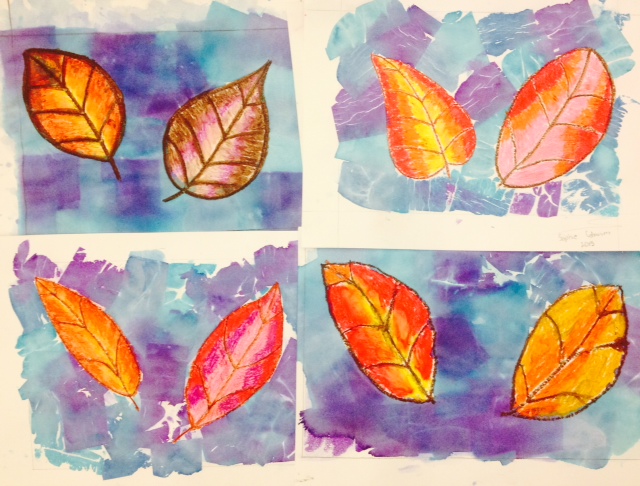
This is fun technique, the effect looks like watercolor.
Tissue Paper bleeding and oil pastels create these amazing fall leaves.
This was 6th Grade, but this lesson can be done with any upper elementary grade level or middle school, using oil pastel or crayons.
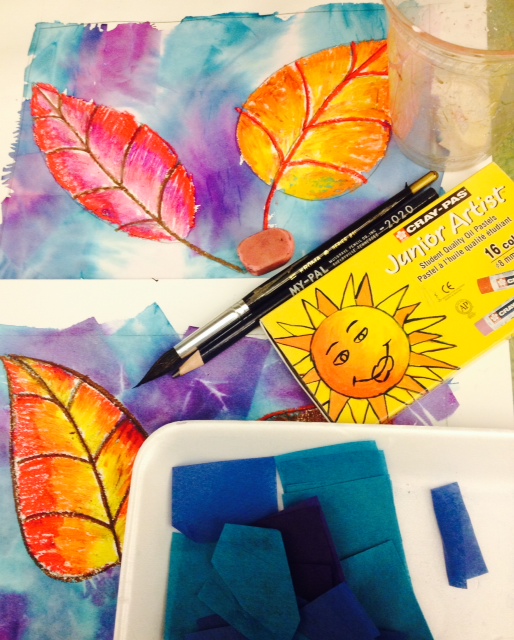
Materials: Cray Pas oil pastels, watercolor paper, and blues & purples of cut tissue paper, ruler, pencil & eraser, water cup, paint brush **Test the tissue paper to make sure that the tissue paper does bleed. Some brands do not bleed.
This Fall Leaves Art Lesson can be adapted for 3rd grade & up
Begin by using the ruler to make a border around the edges of the watercolor paper. This keeps the paper from curling up after being painted on with water.
Draw 2 or 3 different types of large fall leaves and outline them with a brown or red oil pastel. Use warm colors of oil pastels to create a light to dark transition in each leaf segment. The focus is creating a transition of color with the oil pastels on each part of the fall leaf.

Brush water on a section of the watercolor paper and start placing pieces of tissue paper over the wet part. It is necessary to work in small sections to be sure the paper is wet when placing the tissue paper on. The color from the tissue paper bleeds on to the watercolor paper. Let dry completely and shake off the tissue paper when dry.
Happy Fall!
-Art Teacher in LA
MORE FALL ART LESSONS YOU’LL LOVE…


HI, just wondering what’s the standards covered here?
Skills, Processes, Materials, and Tools
This lesson is focused on exploring art materials, learning blending techniques with oil pastels and the process of a wax resist.